Outbound Email
In this guide, we will walk you through the steps to get started, explore the features, and provide helpful tips
Overview
The tool is designed to create effective, personalized emails for your business. By incorporating specific details about your business and customer, it crafts emails that encourage positive responses.
Getting Started
To access the tool, sign up for a subscription plan*. After completing the registration process, log in using your credentials.
* here is more about Pro and Free versions.
Follow these steps to use the tool effectively:
-
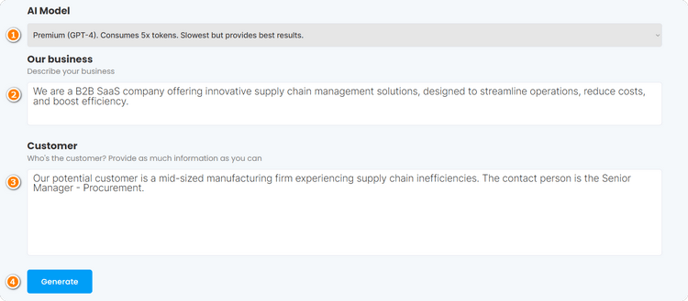
Select the desired AI model (Basic GPT-3.5 or Premium GPT-4) from the dropdown menu.

Suitable for basic tasks and quicker results, GPT-3.5 consumes fewer tokens and offers faster processing.
For more advanced tasks and higher-quality output, select GPT-4 which provides the best results but requires 5x the tokens and has a slower processing speed.
- In the "Our business" field, provide a concise but detailed description of your business. Ensure you highlight key aspects such as your business domain, products or services offered, value proposition, and unique selling points.
- In the "Customer" field, provide as much information about your customer as possible. This could include their industry, company size, their role within their organization, and any known pain points or interests.
-
Click Generate to initiate the email creation process.

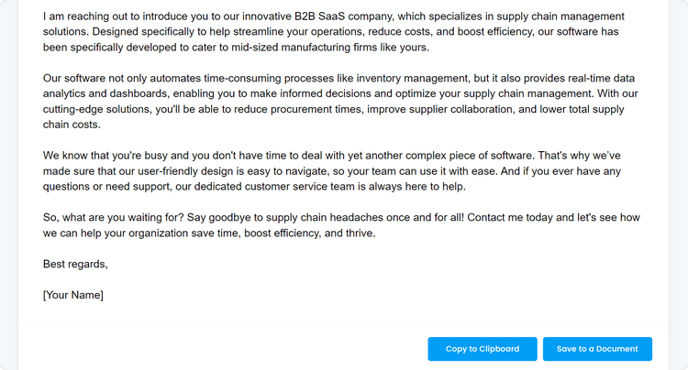
- Review the generated email.

Once satisfied with the result, click "Copy to Clipboard" or "Save to a Document" to store your rewritten content.
Useful Tips for Outbound Emails
- Be thorough and precise in detailing your business and customer profile.
- Understand and address your customer's needs and pain points.